Author Archives: lainapickrel

About lainapickrel

I am a writing, editing, traveling Seattleite who enjoys cooking and crafting on a budget and upcycling/repurposing.

DIY Spray Paint Chevron Table

Standard

20121016_3092


Turn an ugly fixer-upper piece of furniture into a bold and beautiful addition to your living room!

I made a big move and had to get rid of a lot of my stuff, which meant getting new stuff at a good price. I found this coffee table at the goodwill for $5, but it was really ugly. I wish I had a “before” picture! My friend and I decided it was a craft just waiting to happen! I had always wanted to try Chevrons, and this was the perfect opportunity!

Here’s what you’ll need:

  • A fixer-upper table (or other piece of furniture)
  • A sander and matching sand paper
  • Sand paper for the little cracks a sander can’t get to
  • Blue tape. I got 2-inch tape, but you can choose whichever size you like. The smaller the tape the smaller the chevron.
  • Spray paint in two colors of your choice (I went with taupe and white)
  • A clear coat spray paint. I got one that would be water resistant, so I could set cups on there without worrying.

Directions:
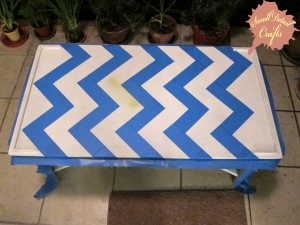
  1. Tape off your chevrons on the tableThe table I started with had peeling varnish on it. You want to make sure you sand that off so the spray paint sticks.  Sanding was the most time-consuming part. I don’t have a sander, but luckily my move brought me closer to my parents place. My dad loaned me his sander, which saved a lot of time! There will be little cracks and curves and crannies that you’ll have to use sand paper for, though.
  2. Once it is all sanded down, you’ll want to spray it with your base color. My base color was white. Spray from far away to get a nice even finish.
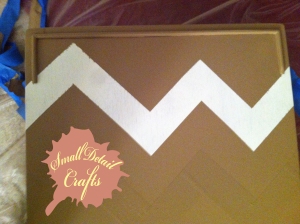
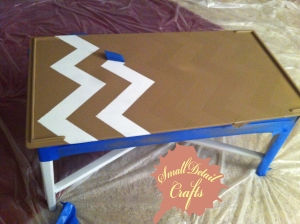
  3. Now to lay down your blue tape. This is the tricky part. You’ll notice that my chevrons are not perfect. That is because I perfected the art after I started. What you’ll want to do is measure out pieces of tape to be the exact same size. 5 inches is what I ended up going with. Then, as you go along, you’ll lay down each piece of tape corner-to-corner so they overlap and leave a perfect angle.DIY Spray Paint Chevron Table
  4. Take a credit card and carefully smooth down all edges of your tape so the paint won’t bleed. (In the picture to the right you can see that the left upper corner didn’t get smoothed down enough and the paint bled a little.)
  5. Tape off everything else you don’t want to get your secondary color on – sides, legs, etc.
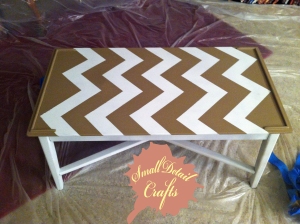
  6. Spray your secondary color. In my case, this was the taupe/brown color I chose.
  7. Once everything has dried, carefully peel off the tape.
  8. Now you’re ready to spray on your clear coat. I wanted to make sure my table was well-protected, so I put on two coats.peel off the blue painters tape

Viola! You now have a beautifully redone table (or other piece of furniture) that you can be proud to show to company!

This was simple once you got past the “how do I lay down the tape?” part. The most fun was peeling off all the paint to reveal the chevrons!

Have fun, and please comment with your trials and errors below, I would love to see what you come up with in terms of colors and different furniture pieces! The possibilities are endless!

DIY Spray Paint Chevron Table

DIY Spray Paint Chevron Table

<3, Laina & Small Detail Crafts

Want to know about more fun crafts and upcycling projects like this? Visit my Pinterest!

Do you enjoy cooking as much as crafting? Check out Small Detail Food for some appetizing recipes!
DIY Candle Making Tutorial

Standard

20120418_9792

I don’t know about you, but I absolutely love candles! I saw a Pinterest post a while ago about how to make your own candles and wanted to try it myself (you can see the blog post “DIY Survival Candles” here).

Here’s what you’ll need:

  • soy wax flakes
  • wicks
  • glass jars
  • wooden chop sticks, not pulled apart
  • a crayon or two of your desired color(s)
  • candle scents in a flavor of your choice

I looked up a few of the closest craft stores and called around to see who had soy wax flakes and wicks, etc. It turned out a local soap shop had everything I needed. Before buying wax and wicks do some research or ask the shopkeeper which ones are compatible. My first candles would burn out because the wax didn’t burn as quickly as the wick, and the opposite can also be a problem.

When I bought the soy wax flakes I way overestimated how much I would need. Start small and if you want to make more get more — to start you probably don’t need more than a pound. Here’s what you’ll need to do:

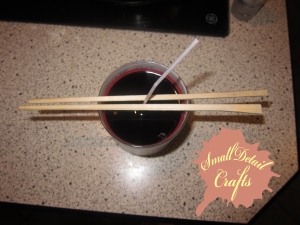
  1. Set up jars and center wicks in them, keeping them stable by pinching the top part of the wick between the chopsticks and setting the chopsticks over the opening of the jar (see picture).

    You'll notice the chopsticks are broken in this picture -- it is much easier if they are not broken apart.

    You’ll notice the chopsticks are broken in this picture — it is much easier if they are not broken apart.

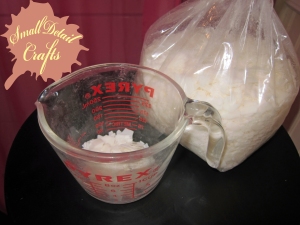
  2. Melt the wax. You can do this in one of two ways. Melt the crayon and soy wax flakes in a double broiler or equivalent (a small pot set into a bigger pot filled with water over the stove), or you can put it in a microwave-safe bowl and microwave for two minute intervals until it is completely melted. Try to use a pan or container that you dont care about too much; the wax will come off, but it takes some work. A note on the crayon: you only need about half a stick per pound, give or take, mix it in once everything is melted.

    Use a double broiler (or equivalent) or a microwave-safe container to melt the wax in.

    Use a double broiler (or equivalent) or a microwave-safe container to melt the wax in.

  3. Once all is melted and the desired color, add in the candle scent and stir.
  4. Pour the wax into the jars, leaving a little extra wax for later, and set them somewhere safe to dry. Once they have dried you may notice there is an indentation around the wick. Reheat the remaining wax and pour it into the jar and let dry.
    Notice the indentations around the wick.

    Notice the indentations around the wick.

    I didn't think to leave any extra wax mixture left over to fill the indentations, so I had to use plain soy wax to fill them up, which is why it looks white and milky on top.

    I didn’t think to leave any extra wax mixture left over to fill the indentations, so I had to use plain soy wax to fill them up, which is why it looks white and milky on top.

  5. Trim the wick and enjoy your home made candle!

20120418_9796

I’m going to be publishing another post about how to recycle candles by making new ones out of old ones. I’ve had a lot of luck with it, so stay tuned!

Cheers,

Laina

If you enjoy crafts such as this one check out more on my pinterest.

If you enjoy cooking take a look at Small Detail Food, yum!


Basket making

Standard

20120621_0572

I just wanted to share a few pictures of when I made my first basket! It was a very fun experience and the nice thing is you can make it for any purpose you like. I wish I could share the specifics of where to get materials, but all I know is you soak the wood overnight. My friend Laurie had everything ready to go and just guided me along as we went. I’m sure you could look up where to get materials near you and the shop people could tell you where to go from there.

20120621_0565

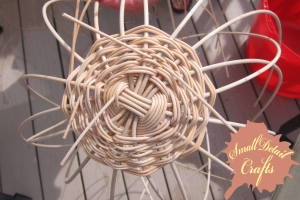
The bottom is sometimes hard to start and get set right, but you expand and when you want to start with the sides…

20120621_0567

…you just start making it the same length/tightness all around. As you can see, I added beads to mine.

20120621_0569

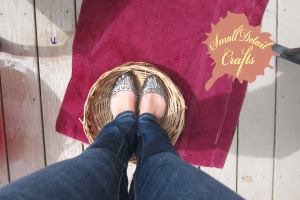
The bottom of my basket wasn’t sitting flat enough for my liking. According to my lovely teacher, if I stood on it it would set right. It set great!

20120621_0570

As you can see, you can use soaked wood or even rope. This rope is such a lovely color because it washed up on shore where Laurie saved it for such a project. She used shells she’d collected that happened to have holes in them and strung them on as feet for her basket. Here she is cutting the extra long ends off.

20120621_0573

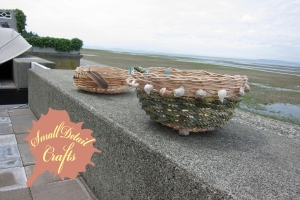
Here are the finished baskets.

20120621_0576

I made mine for my kitten Tiger Lily. At first it was for a sleeping basket, but now that she’s big I use it for all her toys. I made this basket the day I went to get her!

Hope this inspires you!

If you like crafts such as this, feel free to check me out on Pinterest. If you enjoy food then take a look at Small Detail Food!

Cheers,

Laina

2012 in review

Standard

The WordPress.com stats helper monkeys prepared a 2012 annual report for this blog.

Here’s an excerpt:

600 people reached the top of Mt. Everest in 2012. This blog got about 3,600 views in 2012. If every person who reached the top of Mt. Everest viewed this blog, it would have taken 6 years to get that many views.

Click here to see the complete report.

No Sew DIY Fourth of July Spray Paint Tank Top

Standard

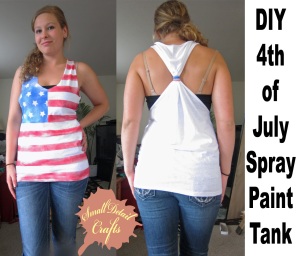
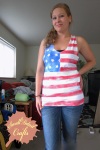
I am going to what is supposedly the most epic 4th of July party in the history of ever (according to every person who’s been in the years before). It is actually a whole weekend event, so when I saw this tank top on Pinterest I figured I had to make it. Unfortunately the picture didn’t have a tutorial attached, so I decided to wing it. My girlfriend and I got together and picked up a couple boy Ts from the Goodwill and stopped by Joann’s for the rest of the supplies.

Here’s what you’ll need:

  • A plain white T shirt
  • Blue tape
  • Red and blue spray paint (NOTE: it is way cheaper to buy this somewhere besides a craft store! i.e. Lowes, Fred Meyer…)
  • Star stickers
  • Scissors

Directions:

  1. Cut your T shirt how you like (For a easy way to fold it so that everything is even see my “How to fold for even cutting” picture). Be sure to save one of the sleeves you cut off. (If you want more detailed directions on how to cut the shirt look at this DIY tank top tutorial from Dollars, Sense & More.)

    How to fold for even cutting: Match up the shoulder seams and fold in half so it’s folded on the front and back instead of the sides. This way you can cut the neckline evenly and also both sleeves at once instead of worrying about making them even.

    Tape off your shirt

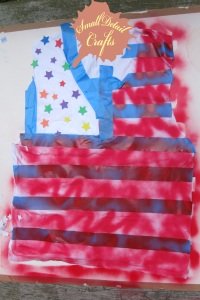
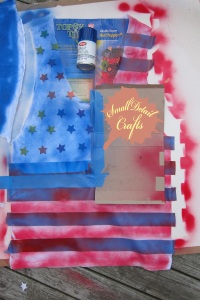
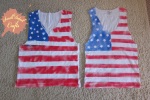
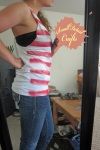
  2. Slide a piece of cardboard inside the shirt. For the red part tape off stripes and make sure to cover up the part you want to make blue. Depending on what kind of stripes you want you’ll spray differently. I went with a more faded look so I sprayed from farther away, while my friend did a more graffitied look. You could also do it more solid if you like. (Keep in mind that the thicker you spray the paint, the stiffer the fabric will be.)

    Faded look

    Graffitied look

  3. After the red has dried, take off only the tape that’s over the section where you want blue and tape over the surrounding red parts. Lay down your star stickers however you like and spray away!

    Put on star stickers

    Tape off surrounding red sections and spray

  4. Take one of the sleeves that was cut off and spray it whatever color you like. I did both red and blue. You’ll cut this and use it to tie the back together.
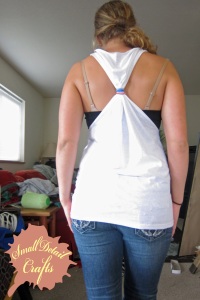
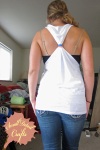
  5. After everything has dried, take off all the tape. Cut your sleeve piece lengthwise — it can be skinny or thick, depending on the look you like (Mine was about two inches — keep in mind that it will roll a bit). Tie the back together with your extra strip, knotting twice with the knot on the inside. Cut the ends off, leaving enough extra to tuck it into the knot so they don’t show.

    Knot the back together and tuck in the ends

    Graffiti look on the left, faded on the right

Enjoy!

NOTE: You can do any design with this idea. You could do letters or cut out a silhouette and spray paint over those as well. You could do a tank for each holiday! I have also seen fun Pinterest shirts where you spray over a cut-out with bleach instead of spray paint. Have fun with the possibilities!

If you like crafts like this check out more on Laina’s Pinterest.

Do you also enjoy cooking, eating, and food? Take a look at Small Detail Food!

DIY Lavender Bath Salts

Standard

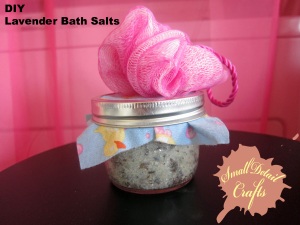
Do it yourself lavender bath salt

For Christmas last year I made various jar gifts, including Mocha Cocoa Mix, Sugar & Spice Face & Body Scrub, and Lavender Bath Salts. These projects were all pretty easy and fun to do, as well as wonderful gifts for yourself and others! Just add the lavender bath salts to your bath, or even to a foot soak, and soak in the luxury!

What you’ll need:

  • 1/2 cup sea salt
  • 1/2 cup epsom salt
  • 1/4 cup dried lavender (or other yummy-smelling dried herb/flower)
  • 5 drops essential oil (I didn’t have any so I used vanilla extract)

Directions:

  1. Mix the salts and Lavender together in a large bowl.
  2. Add the essential oils one drop at a time, mixing well between each drop.
  3. Store in a jar. You can use a mason jar or a recycled glass jar (such as an old jam or salsa jar).
  4. To use, add as much as you desire to bath water (a few tablespoons should do the trick).

This recipe only yields a little less than a cup and a half. For gifts, I needed to fill ten one-cup mason jars. If you need a larger yield, here are the measurements for ten cups of lavender bath salts:

  • 4 cups sea salt
  • 4 cups epsom salt
  • 2 cups lavender
  • 1/2 teaspoon essential oil

Happy bathing/gifting!

If you like crafting and want more ideas, check out Laina on Pinterest, where you’ll find crafts, recipes, and a whole lot more!

Do you like food? Cooking? Eating? Take a look at Small Detail Food, where you’ll find easy, delicious & economical recipes.

The RE Store, reclaimed building materials for a greener home

Standard

I recently visited The RE Store for the first time. I’d heard wonderful things about it but had never made the time to stop by. It was like fun land for crafter/upcycle/repurpose/reclaimers! I wanted to share some fun pictures I took while I was there. Oh, the possibilities! I know they have a RE Store Bellingham and in Seattle. If you love making old things new I highly suggest you find a similar store in your location. Feel free to comment your findings!

If you like Small Detail Crafts, check out Small Detail Food, where you can fine easy, delicious and economical meals!

Check out Laina on Pinterest to find more fun ideas, crafts, and recipes!

How to Make Your Own Gift Bags

Standard

Gift bags can get so expensive, so here’s a do-it-yourself step by step tutorial on how to make your own gift bags. For paper I used brown postal package paper, since I needed my bags to be larger and durable, but you can use wrapping paper, magazine paper, scrapbooking paper, a map, or even pages from a big children’s book. On the top in the picture above are bags I made from a christmas catalog. Junk mail turned useful!

What you’ll need:

  • Scissors
  • Paper of choice
  • Tape
  • Ruler

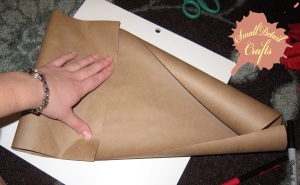
To start, you need to cut a length of paper. I had to make a couple bags before I got the right size for my purposes (be sure to keep note of dimensions!). If you start with a 15.5 inch by 10 inch piece of paper and fold the bottom up three inches you’ll end up with a 8.5 inch tall, 4.5 inch wide, and 3 inch deep bag. (Note that those are not the dimensions of the bag in the pictures.) Something to keep in mind while doing this project is when making a fold, you want to crease it really well. If you don’t have fingernails for this, keep a ruler handy.

Once you have your paper, lay it face down, vertically. If you plan on making handles, fold the top part down just far enough so that it will add reinforcement and keep the edges from showing. If you plan to fold it over to hole punch it and string with ribbon as I did, then you can skip that step.

Bring the edges inward, careful not to fold it yet.

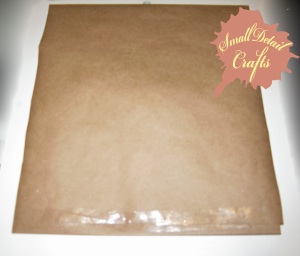
Now tape the edges together, still being careful not to fold anything yet. It’s hard to tape it and hold it at the same time, so I suggest starting with two smaller pieces of tape at the top and bottom before using a longer piece of tape to bind the whole seam.

You should now have a loop. Now it’s time to make a fold. Make your fold near but not on the piece of tape. This will make it so the tape won’t show on the front or back of your bag.

Now flip it so the top is farthest from you. Now you’re going to create the bottom of your bag. Fold the bottom upwards making one crease. The amount you fold upward will be how deep your bottom will be. For instance, if you want a three inch deep bag, then fold up three inches.

Open the part you just folded.

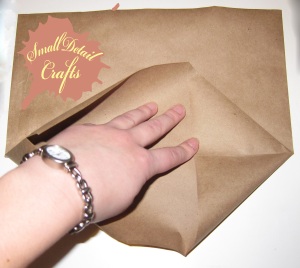
Taking the corner, fold it in on itself along the inside fold line. Do this on both sides.

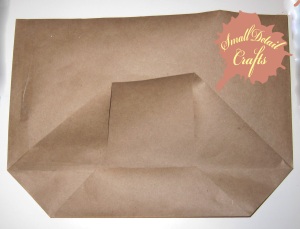
To close up the bottom take the part nearest to you and fold it up to the middle fold line.

Do the same with the opposite side and tape.

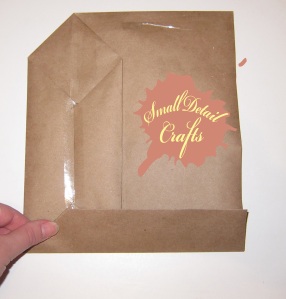
Now you are going to create the sides of your bag. Take a side of the bag (on the right or left of the picture above) and fold the mini square in on itself so the corners are touching and crease well. Try to line the edges of this mini square up as perfectly as possible.

Fold the crease you just made over and crease it the other way as well.

Do this double fold to the other side of the bag, making sure to touch the mini square corner to corner, lining up the sides.

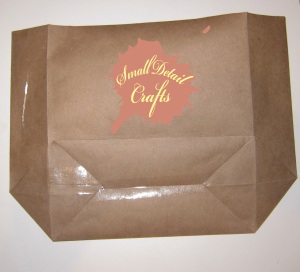
Now carefully open your bag. It will be a little misshapen, but we’ll fix that next.

Crease the sides of the bag the way they should go. The two outer creases should be creased from the outside, and the middle one should be creased from the inside.

Fold your bag up like an empty gift/grocery bag. If you have to force it a little it means something didn’t line up properly while you were folding, but that’s ok, just gently fold it up and press it out.

Now it’s time to decorate! You can hole punch it and thread ribbon through as I did, or you can hole punch and add handles. I used Christmas cutouts, To/From labels, and some cut up dollar store flowers for my bags. You could use glitter and glue, or stickers, or if you used pre-decorated paper you could just add a tag. Have fun getting creative!

If you like crafts like this and want to see more, check out Laina on Pinterest!

Do you like food? Cooking? Eating? Then you’ll enjoy Small Detail Food, where you can find easy, affordable and healthy recipes!

The “Bored?” Jar: What to do when you have nothing to do

Standard
The "Bored?" Jar

The “Bored?” Jar

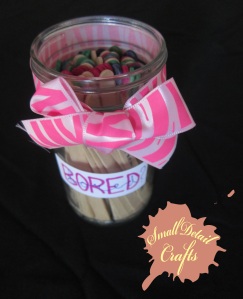
I can’t tell you how many times I’ve been sitting around at home with a friend or boyfriend and one or both of us suddenly gets the urge to go and do something. But what? We will never have to sit around brainstorming unsuccessfully ever again. I give you, The Bored? Jar!

For this craft I combined some ideas from a couple of blogs for date night plans (Six Sisters’ Stuff & Life in the Green house). This jar of activities is great for friends, couples or just yourself.

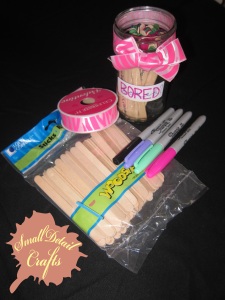
Supplies for The "Bored?" Jar: What to do when you have nothing to do!

What you’ll need to make The “Bored?” Jar

Here’s what you’ll need:

  • Popsicle sticks
  • 1 Jar (I used an old ranch dressing jar with the label taken off)
  • 3 sharpies in different colors
  • 1 black ultra fine tip sharpie
  • Ribbon (optional)
  • Label (optional)

The Bored? Jar:

  1. To start, put your popsicle sticks in the jar so it’s full but not stuffed, make sure you can still easily grab one from the jar.
  2. Get your three colored sharpies and black sharpie handy. Each color will signify a category: cost money, go somewhere, or stay home. Decide what each color will signify. I used green for cost money, purple for go out, and pink for stay home.
  3. Go through the following list. Before you write down the activity on the popsicle stick, decide what category it falls under (i.e. “Make breakfast & eat in bed” would fall under stay home, so I colored the tip of my popsicle stick pink). Color the tip of the popsicle stick the corresponding color and then use the black sharpie to write the activity down. Replace the popsicle stick, color tip up, in the jar and keep going!
  4. Once you get to the end of the list, cut some ribbon to the correct size and tie it around the jar.
  5. Using a label or piece of paper, write “Bored?” on it and attach it to the jar. If you like, add what the color categories mean.
The "Bored?" Jar

The “Bored?” Jar: what to do when you have nothing to do!

If you have extra popsicle sticks, add things you like to do or take the extras out. Keep some blank ones handy so you can add activity ideas as you think of them. Once you use one you can turn it upside down so you go through each one, or just replace it color tip up. Now you will never be bored with nothing to do again!

Here’s the list of activities:

Stay Home:

  • Find a recipe you’ve never tried and cook it together
  • Make indoor smores and read/tell campfire/scary stories
  • Wii Game night
  • Make Muddy Buddies
  • Make ice cream sundaes
  • Have a spa/pamper night
  • Have a game night
  • Make breakfast and eat in bed
  • Play 20 questions
  • Make chocolate fondue
  • TV show marathon
  • Make a new dessert recipe together
  • Have a living room camp out
  • Make home made pizzas
  • Read together
  • Stargaze
  • Have a movie marathon

Go out:

The "Bored?" Jar

The “Bored?” Jar: What to do when you have nothing to do!

  • Go on a hike
  • Go on a bike ride
  • Go to a park
  • Go to a local car dealership and test drive a car
  • Try a new sport
  • Take a drive, see some beautiful scenery
  • Make a picnic
  • Be a tourist in you own city (cheesy pictures and all!)
  • Take a free factory tour
  • Pick a theme and center everything for the rest of the day around it
  • Fly kites
  • Exercise together
  • Go to a local book store & look at photography books together

Cost money:

  • Dress up and go to a new place for drinks
  • Restaurant hop: go to a new restaurant for each course
  • Go skating or rollerblading
  • Go to the arcade
  • Go out for ice crem
  • Drive-in dinner/movie
  • Go for a swim, or hot tubbing
  • Visit the zoo or go see wild life
  • Have a coupon date
  • Go to a local fair or carnival
  • Go to a local sporting event
  • Go to a thrift store, pick out funny outfits for each other
  • Go see a play or comedy show
  • Go bowling
  • Take lessons
  • Try a new restaurant
  • Desert only date
  • Go carts
  • Visit a bakery and pick out a treat
  • Check out a local museum
  • Go find yard sales, treasure hunt
  • Laser tag

Happy un-boredom!

If you like this post and want more fun crafts, check out Laina on Pinterest!

Do you like Food? Cooking? Eating? Check out Small Detail Food!

Trash or Treasure?

Standard

I’ve created a new “Tips” tab, where I’ll be posting tips for crafting. So far, I’ve posted “Trash or Treasure?” ideas, sharing what I save and why. I’ll be adding to the list as I think of more things! Hope it is helpful 🙂

Trash or Treasure? Here is a list of things I keep and store in my craft supplies instead of tossing:

  • The “hanger” straps inside tops and dresses. If they are made out of ribbon I cut them off the shirt and put them in my ribbon jar.
  • Glass jars & their lids. Salsa, pickles, jam… They’re just as good as mason jars and sometimes come with fun shapes or designs!
  • Old maps or atlases. You can do tons of different crafts with these, and they look so fun, too!
  • Old loofas. You can toss them in the wash (but not the dryer!) and cut them apart to use as netting or decoration.
  • Fun greeting cards. You can cut out and use the front of the Thank You/Birthday/Sympathy card to make a new one!
  • Packing Peanuts. I once made a bean bag chair and filled it up with packing peanuts (My work had a bunch of garbage bags full)! Much cheaper than buying the big filler bags at the store.
  • Wire, twine, string. I keep usable lengths in a big jar (Here’s where an empty pickle jar can come in handy!).
  • Old, broken crayons. They are great for coloring candles, or making those fun melted crayon on canvas projects. You can even melt them down in muffin tins or molds to make new, shaped crayons.
  • Magazines. One of my favorite things to do is decoupage!
  • Strips of cloth. After sewing I always have small strips of cloth that I put in a jar next to my sewing machine. These can come in handy for many a craft project!
  • Old silverware. You can bend them into all sorts of shapes (rings, hooks, bracelets) or make a wind chime out of them.
  • Candle wax. I always save that little bit that won’t burn anymore and save it in a jar until I can get a new wick and melt it all down to make a new candle. You can also put your “excess wax” jar on a “no flame” candle burner.

Are you creative? Love crafting? Upcycling/repurposing? Check out Laina on Pinterest!

Enjoy food? Eating? Cooking? Find easy and affordable recipes at Small Detail Food!