Gift bags can get so expensive, so here’s a do-it-yourself step by step tutorial on how to make your own gift bags. For paper I used brown postal package paper, since I needed my bags to be larger and durable, but you can use wrapping paper, magazine paper, scrapbooking paper, a map, or even pages from a big children’s book. On the top in the picture above are bags I made from a christmas catalog. Junk mail turned useful!
What you’ll need:
- Scissors
- Paper of choice
- Tape
- Ruler
To start, you need to cut a length of paper. I had to make a couple bags before I got the right size for my purposes (be sure to keep note of dimensions!). If you start with a 15.5 inch by 10 inch piece of paper and fold the bottom up three inches you’ll end up with a 8.5 inch tall, 4.5 inch wide, and 3 inch deep bag. (Note that those are not the dimensions of the bag in the pictures.) Something to keep in mind while doing this project is when making a fold, you want to crease it really well. If you don’t have fingernails for this, keep a ruler handy.
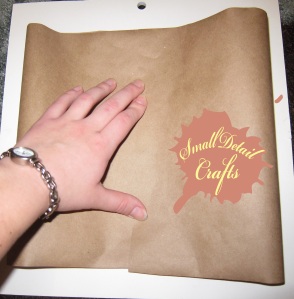
Once you have your paper, lay it face down, vertically. If you plan on making handles, fold the top part down just far enough so that it will add reinforcement and keep the edges from showing. If you plan to fold it over to hole punch it and string with ribbon as I did, then you can skip that step.
Bring the edges inward, careful not to fold it yet.
Now tape the edges together, still being careful not to fold anything yet. It’s hard to tape it and hold it at the same time, so I suggest starting with two smaller pieces of tape at the top and bottom before using a longer piece of tape to bind the whole seam.
You should now have a loop. Now it’s time to make a fold. Make your fold near but not on the piece of tape. This will make it so the tape won’t show on the front or back of your bag.
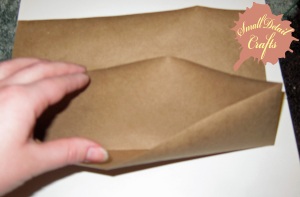
Now flip it so the top is farthest from you. Now you’re going to create the bottom of your bag. Fold the bottom upwards making one crease. The amount you fold upward will be how deep your bottom will be. For instance, if you want a three inch deep bag, then fold up three inches.
Open the part you just folded.
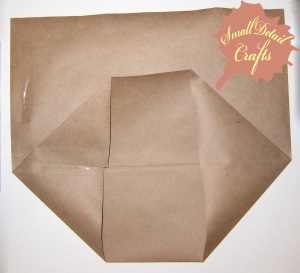
Taking the corner, fold it in on itself along the inside fold line. Do this on both sides.
To close up the bottom take the part nearest to you and fold it up to the middle fold line.
Do the same with the opposite side and tape.
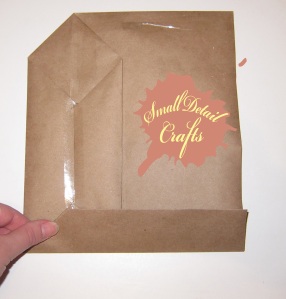
Now you are going to create the sides of your bag. Take a side of the bag (on the right or left of the picture above) and fold the mini square in on itself so the corners are touching and crease well. Try to line the edges of this mini square up as perfectly as possible.
Fold the crease you just made over and crease it the other way as well.
Do this double fold to the other side of the bag, making sure to touch the mini square corner to corner, lining up the sides.
Now carefully open your bag. It will be a little misshapen, but we’ll fix that next.
Crease the sides of the bag the way they should go. The two outer creases should be creased from the outside, and the middle one should be creased from the inside.
Fold your bag up like an empty gift/grocery bag. If you have to force it a little it means something didn’t line up properly while you were folding, but that’s ok, just gently fold it up and press it out.
Now it’s time to decorate! You can hole punch it and thread ribbon through as I did, or you can hole punch and add handles. I used Christmas cutouts, To/From labels, and some cut up dollar store flowers for my bags. You could use glitter and glue, or stickers, or if you used pre-decorated paper you could just add a tag. Have fun getting creative!
If you like crafts like this and want to see more, check out Laina on Pinterest!
Do you like food? Cooking? Eating? Then you’ll enjoy Small Detail Food, where you can find easy, affordable and healthy recipes!









this was a little tricky for me to understand- the bit on how to make the tape disappear, where you have to fold near it. but otherwise i have found this most useful and clever; a little different to the way i make gift bags 🙂
I fold the bag so the tape is on the side of the bag, not necessarily disappeared, but just hidden. A lot of tutorials simply have you fold it so it’s on the back, but I prefer it to be on the sides so that when the bag is folded you don’t see it. You can see it if the bag is open and you are looking for it, but for the most part it is unnoticeable. Hope that clears it up? I tried to take a ton of pictures to help clear up any confusion 🙂
Thank you for this tutorial. It was great. 🙂